|
I wrote the first set of instructions for this back in 2020 when I first started selling hand dyed warps. Since then I've changed the winding method to use multiple ends, as this is much more time efficient, but it does mean some of the photos on the old version are slightly out of date. In essence it's the same method however! Most of us who started out with rigid heddle looms have probably only ever used the direct method of warping, but it's just as simple to put a pre-wound warp on your loom. There are lots of resources on the internet, a few You Tube videos, but not very much by way of step-by-step photo tutorials, which is my favourite way to learn because it makes it very easy to follow the instructions as you work, without trying to pause a video, or wish it would get to the point, or go a bit more slowly. This is my method, it's largely the same as the one in Inventive Weaving on a Little Loom. 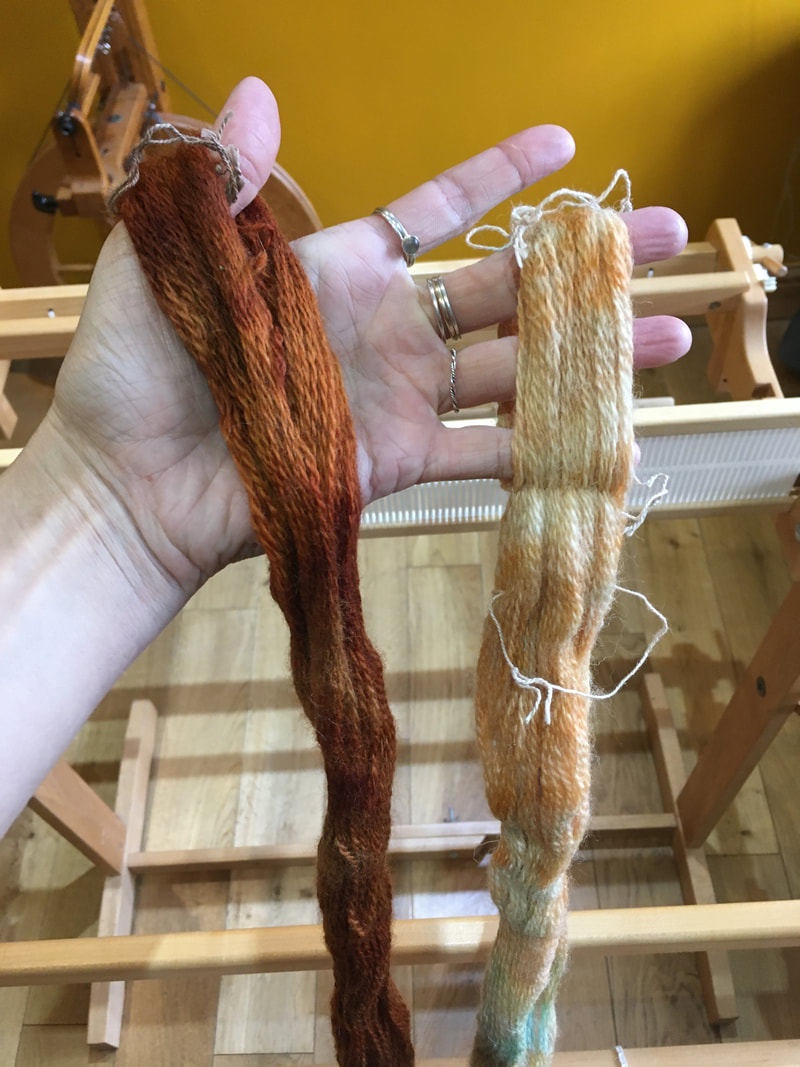 Newer Hilltop Cloud warps have a cross at both ends, so you can work in either direction, older ones only used a cross at one end. The cross is a criss-cross pattern put in as the warps are wound which hold the threads the correct order and stops them getting tangled. In the photo above it's on the right hand side, the end also has more ties, including one around the cross itself, and one in the loop above the cross. Do not cut any ties until you have assembled all your equipment. I recommend using lease sticks. These are sticks that you are going to insert either side of that cross to hold your threads. If you are only doing a narrow warp with bulky yarn you can get away with just using your hands (but you are then attached to your loom until you have completed the warping process. You need 2 smooth sticks of some sort. I have used dowel, but you can use bamboo canes or flat pieces of wood (the slats from blinds work well). In these photos I use the metal rods that I come with my Louet Erica loom as they have a texslov cord which holds everything in place really easily. 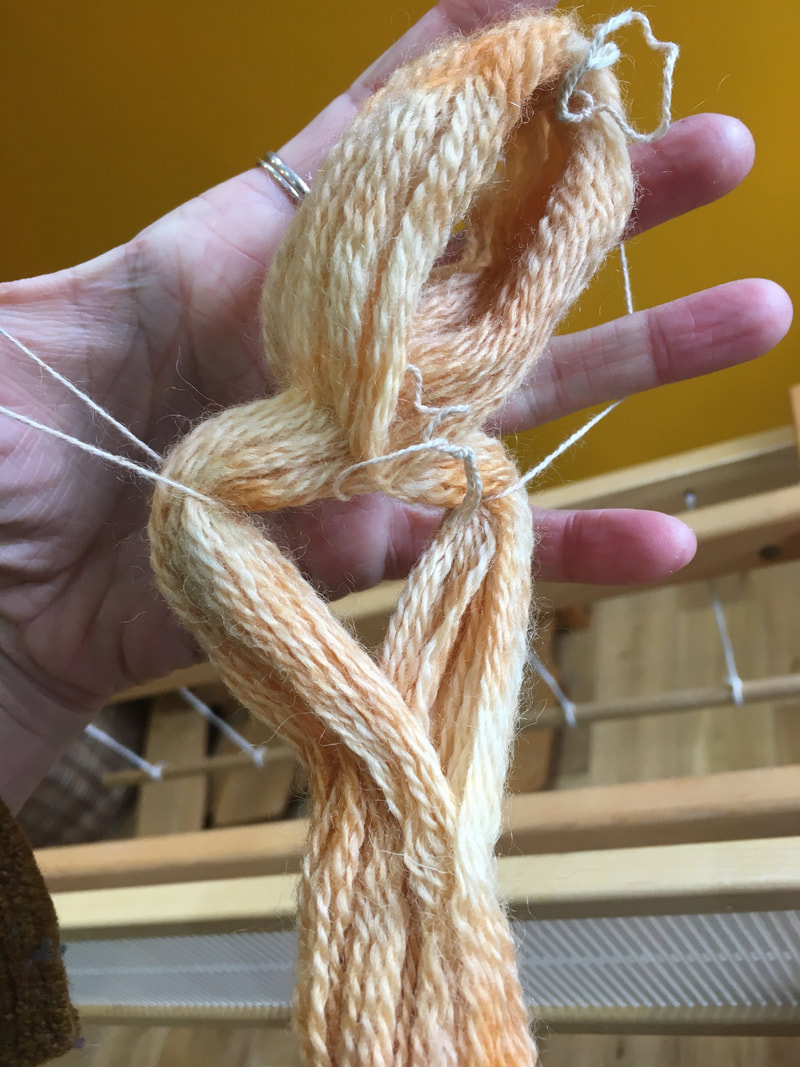 The first step is to identify the 2 loops either side of your cross. Pull each of the ties in that loop in opposite directions and it should open up. (This is easier when you can do it with 2 hands and don't need one hand to hold the camera!) 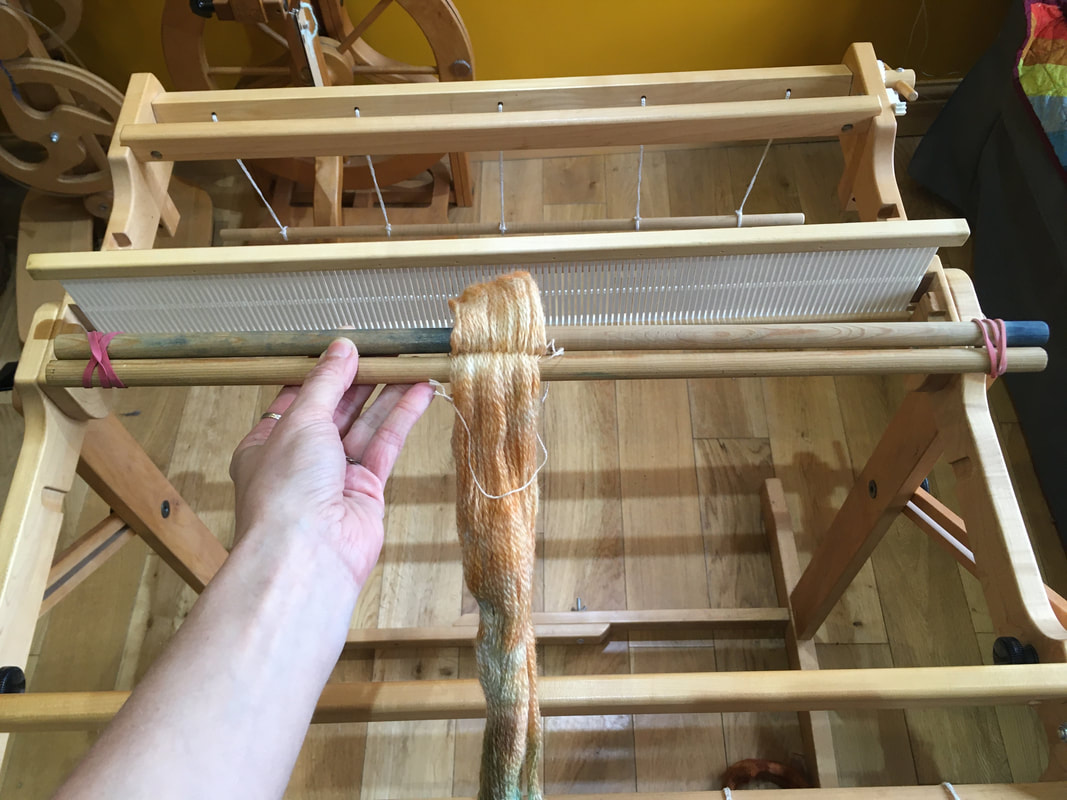 Once you've opened up your loops slide in a stick, one on each side of the cross. Then attach your sticks together in some way. You can drill a hole through your sticks/dowel and thread through some string, but a loosely wrapped elastic band also works, though you do need to leave enough space between the sticks for the yarn to slide. Only once you have done this can you remove the ties. Be careful... you only want to cut through the ties and not the strands on your warp. 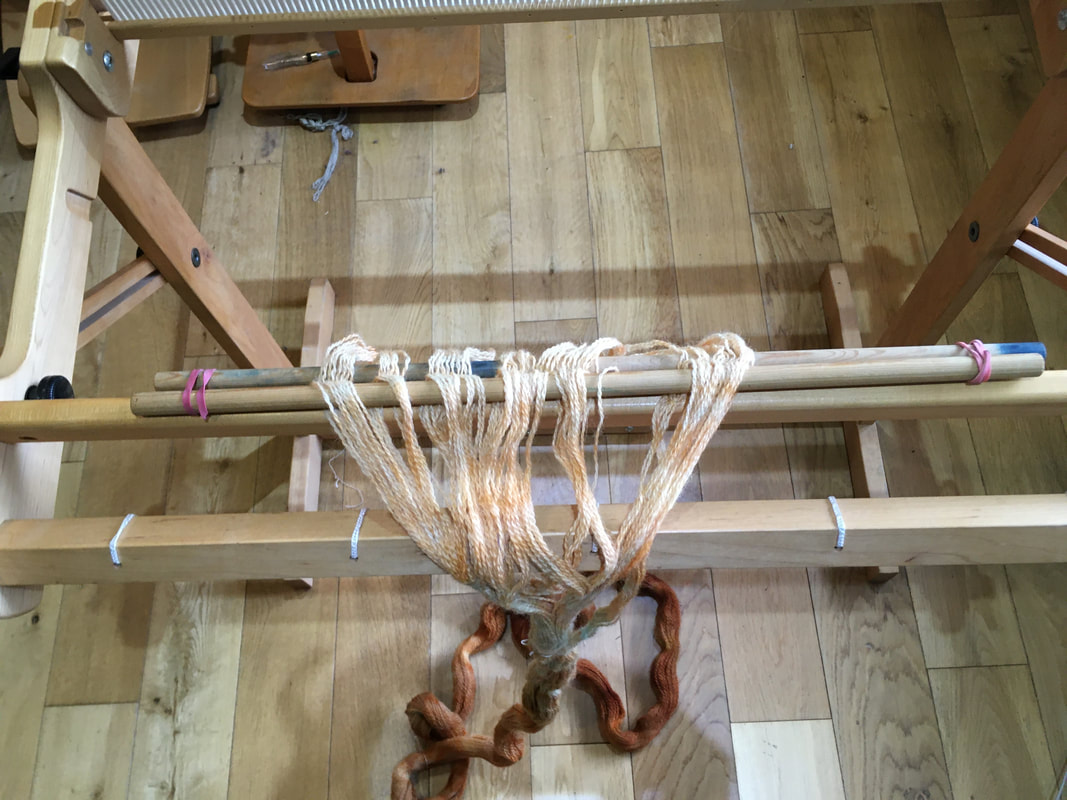 Start to spread your warp out on your lease sticks, and work out where you need to start threading your heddle in order to wind your warp on in the centre of your loom. To do this check how many ends your warp has, and divide it by 4, we'll call this number X. Fid the centre of your heddle, and count along X slots. This is where you will start threading your warp through the heddle. The exact method of the next step will now depend on the type of loom you own. If your loom has a removable apron rod (the piece of dowel held in place with texslov cord that you warp your yarn around when direct warping) the next step is simple. If you have a loom with a fixed apron rod (eg Ashford looms), you can either modify your loom to make it removable, or will have to cut the loops open and tie your warp in place on the back beam just as you would normally do on the front beam. This last method will increase your loom waste, and will require care if you want to keep your colours in your warp aligned. To modify your loom you'll need to remove the plastic rods holding the rod in place, and replace them with texsolv cord. 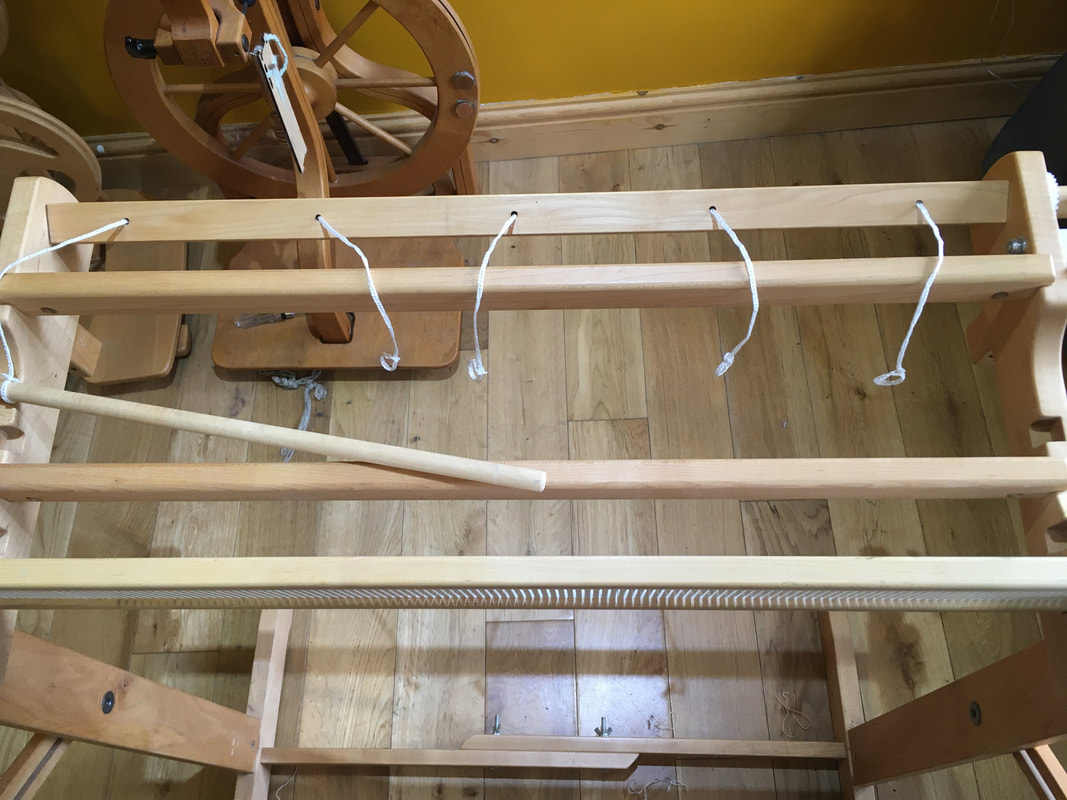 Slide your back apron rod out of the loops on the texsolv cord. If you can, leave the loops open, it will make it easier to slide the rod back in place once your warp is looped on. 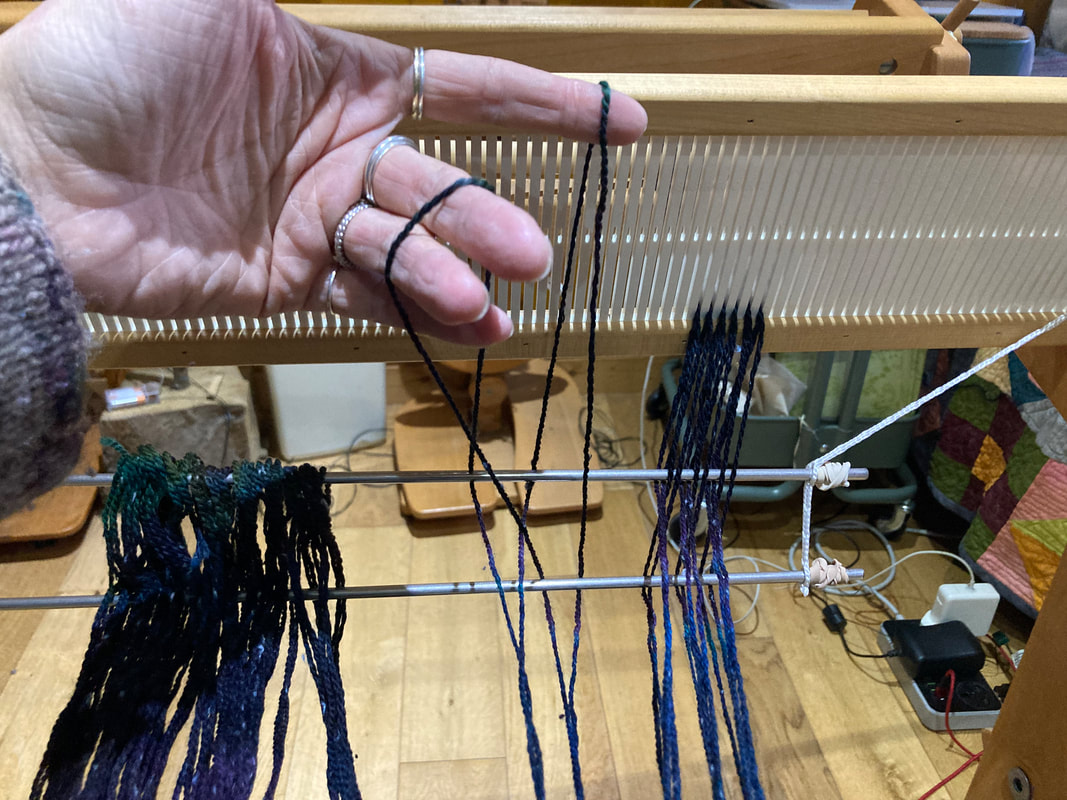 You're now going to thread each loop through a slot in your heddle, and slide it on to the back apron rod. The cross will keep the threads in the right order. It doesn't matter which of the threads from the group you pick, so long as they're all from the same section of the cross. These two threads are from the same cross, but I could thread them in either order. 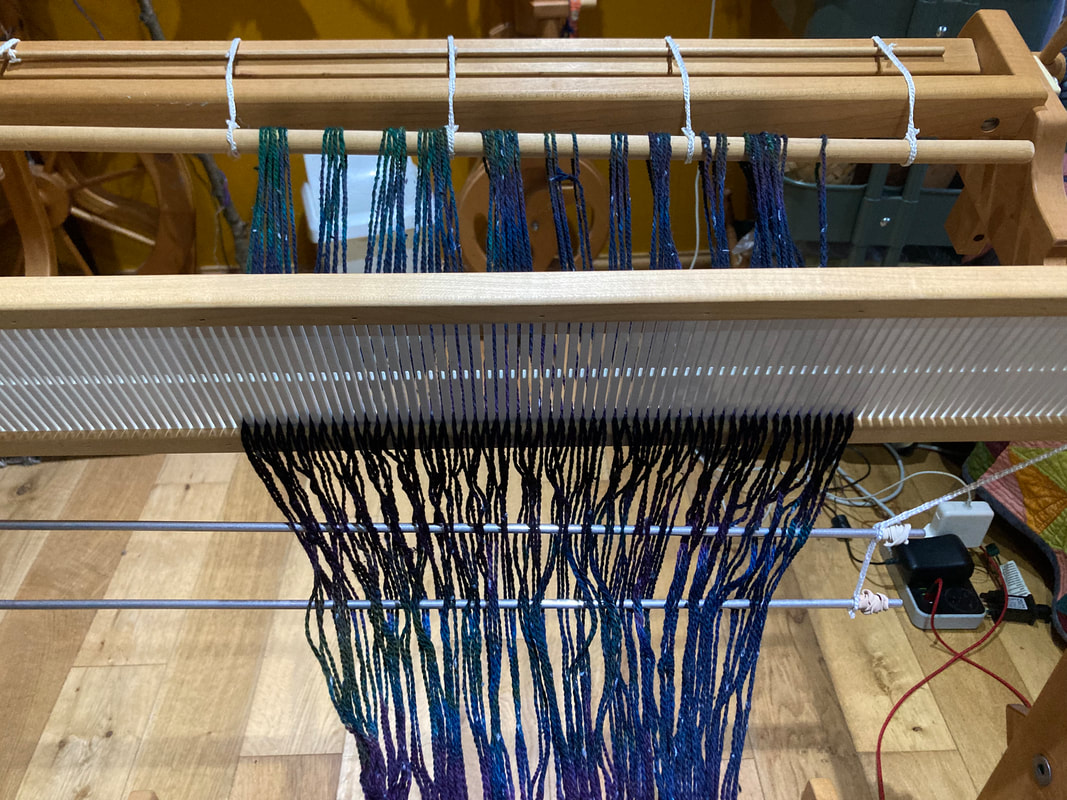 Keep going across the whole loom, threading loops in order, making sure not to miss out any slots. Sliding loops on to the back beam as you work, adding in the lops to hold the back beam in place as you work along. 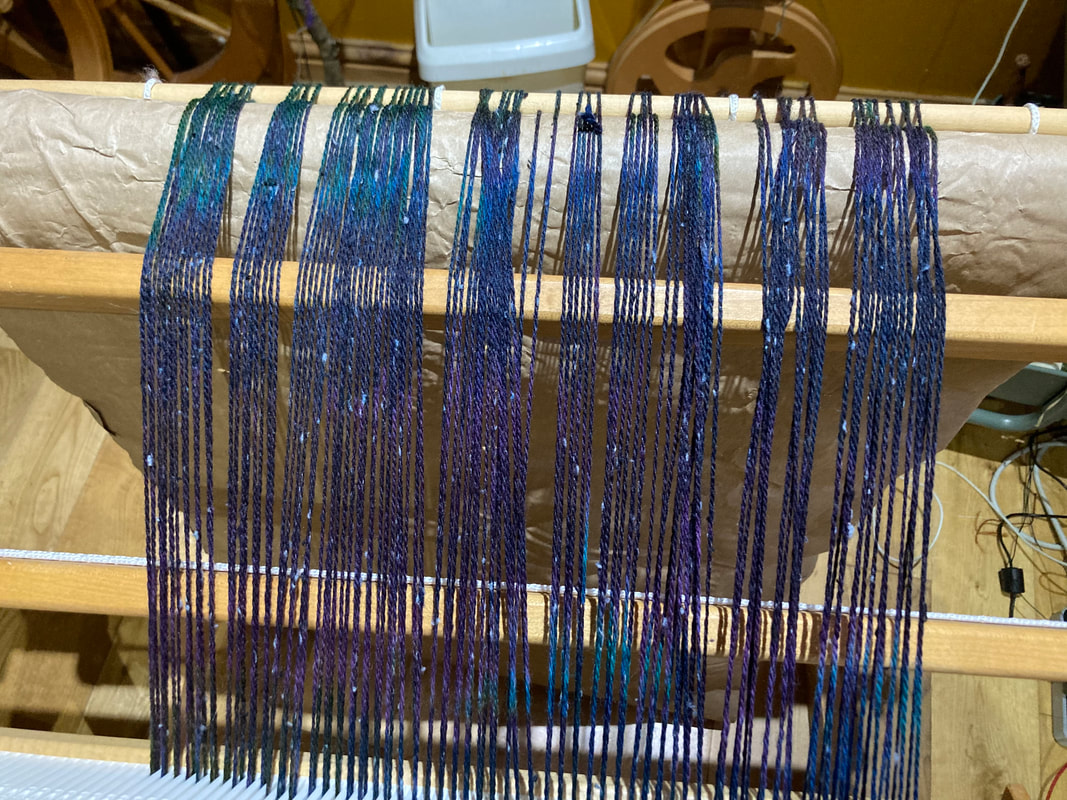 Once you're done your loom should now look like it does when you use a direct method of warping. Loops of yarn around your back apron rod, and 2 strands of yarn through every slot, and the remainder of the warp dangling off the loom. You are now safe to remove your lease sticks, and start to wind your warp on to the back beam. 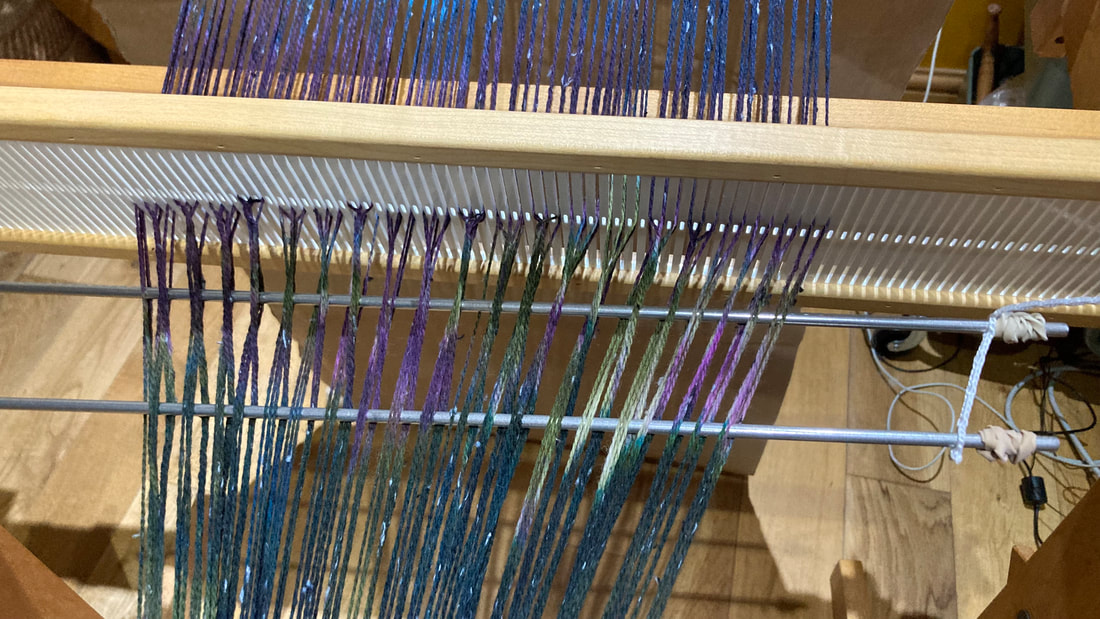 Because these threads were wound in groups there may be places where they're a bit stuck together. Don't force them, just stop, and ease the threads apart. It can be a bit fiddly but it's still much quicker than walking backwards and forwards to direct warp! Keep the threads under tension as you warp and that helps. Stickier wool warps will be more fuzzy than silk warps so won't slide past each other so easily, but with patience the whole thing will wind on smoothly. 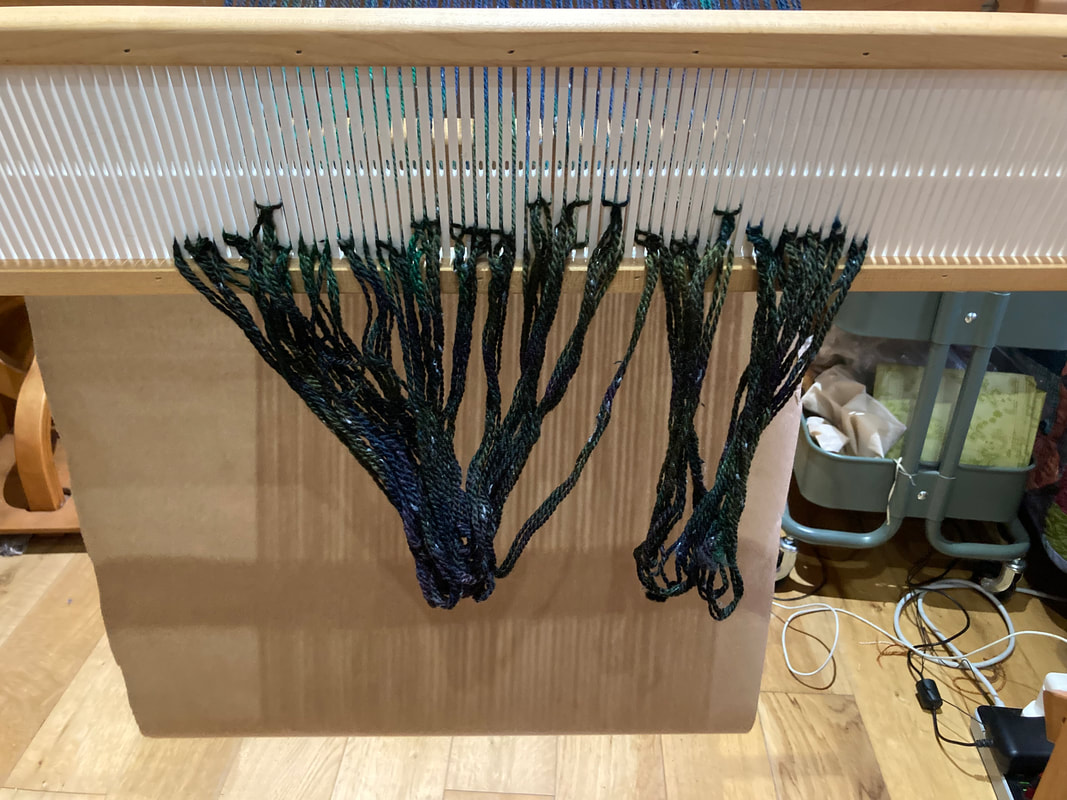 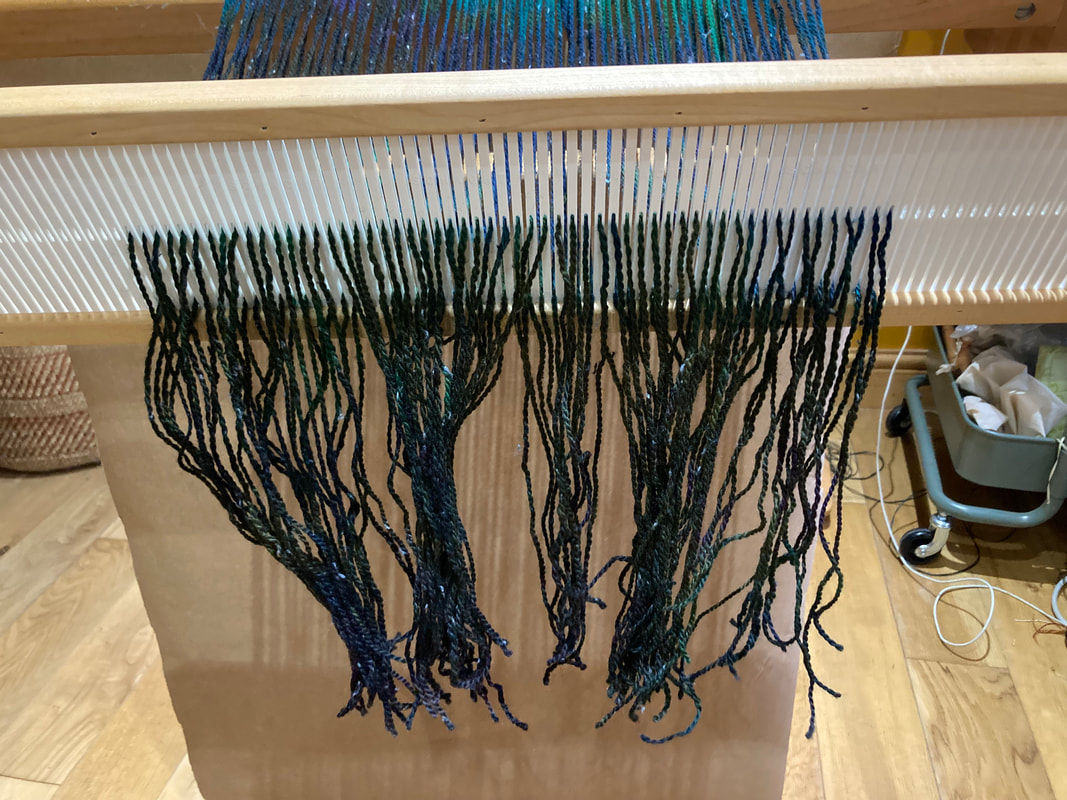 You can then cut open the loops and thread one end from each slot in to a hole. 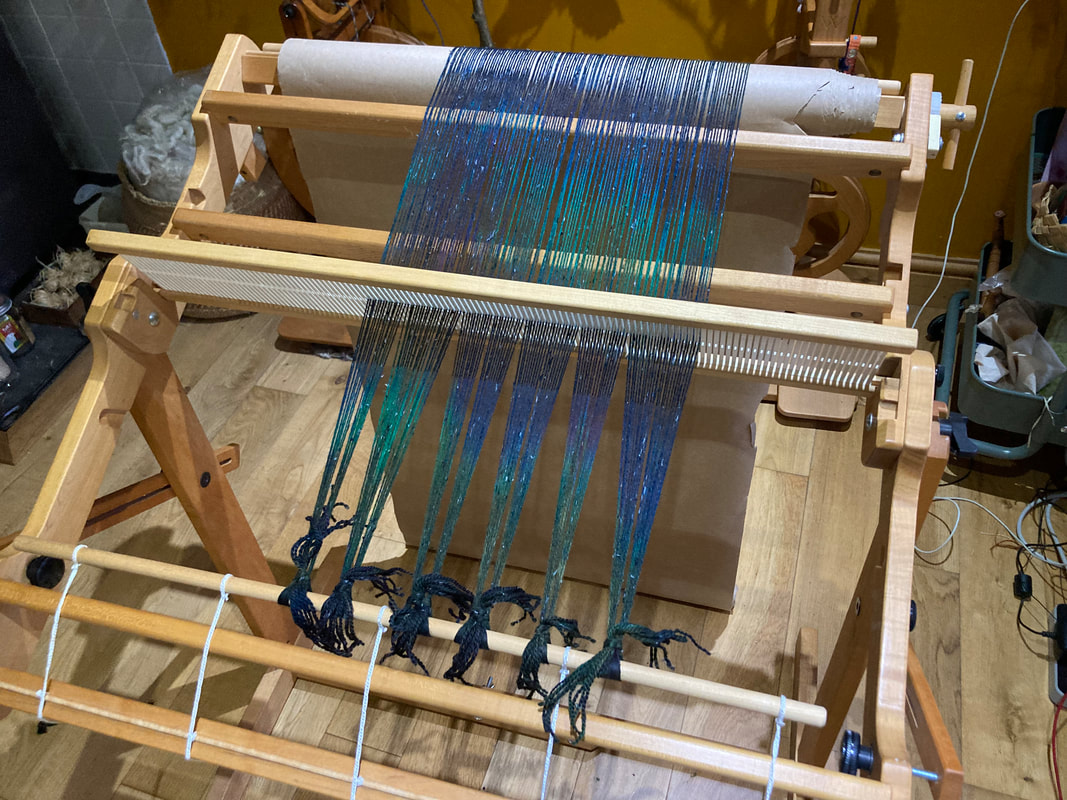 Tie on to the front apron bar and you're ready to weave!
Comments are closed.
|
Archives
January 2024
Categories
All
 |
 RSS Feed
Hilltop CloudHilltop Cloud- Spin Different
Beautiful fibre you'll love to work with. Established 2011 VAT Reg- 209 4066 19 Dugoed Bach, Mallwyd, Machynlleth,
Powys, SY20 9HR |
|
